Creating your domain using AWS Route 53 service
First things first, we need a domain name. A domain name is essentially the text that we type in a browser window to access a particular website. This is the string of text that maps to an alphanumeric IP address managed by DNS, which serves as the phonebook of the internet.
There are many web hosting services where you can register your domain, and they will host your website for you. For examples include GoDaddy, Bluehost, Namecheap, etc. In this case, I will walk you through the steps of hosting a WordPress website using AWS services. AWS Route 53 service is a scalable DNS and Domain Name Registration which allows us to register domains. It also has other features but it’s not relevant in this use case.
Register an available domain using Route 53
Go to AWS console and search for Route 53, then search for a domain of your interest and proceed to checkout

Turn on the privacy protection
After you fill in all your contact information, make sure to enable privacy protection. This ensures that the public won’t be able to access that information on this domain check website: https://who.is/. Depending on the domain suffix you choose, different sets of contact information will be available on this website. You can check the details using this website: https://docs.aws.amazon.com/Route53/latest/DeveloperGuide/registrar-tld-list.html

Afterward, proceed to submit and complete your order. It will take less than an hour. Check your email to see if you receive any email from Amazon for further instructions or actions.
Create your AWS Lightsail WordPress Instance
Search for Lightsail in your AWS console and create an instance. Choose the availability zone that is closest to you or where your users are based, and then select WordPress in the blueprint section. Choose your instance plan as you see fit but you can always change it afterward. Keep the other settings as default and go ahead to create the instance.
An instance in cloud computing refers to a virtual resource provided by a cloud services provider. In this case, a Lightsail instance is a virtual private server (VPS) that resides on the AWS cloud.

It might take awhile to create the instance. You can see the Public IP address associated with the created instance and you can load the sample WordPress website by putting that public IP address in your web browser, You can then go to your WordPress admin page by adding /wp-admin to your public IP address e.g. 18.221.55.11/wp-admin
Now the next question is, where can you can find your login credentials? The default login password is saved in a file located on the instance you just created, which can be accessed using SSH to connect to it. Click on the terminal button and key in this command: cat $HOME/bitnami_application_password
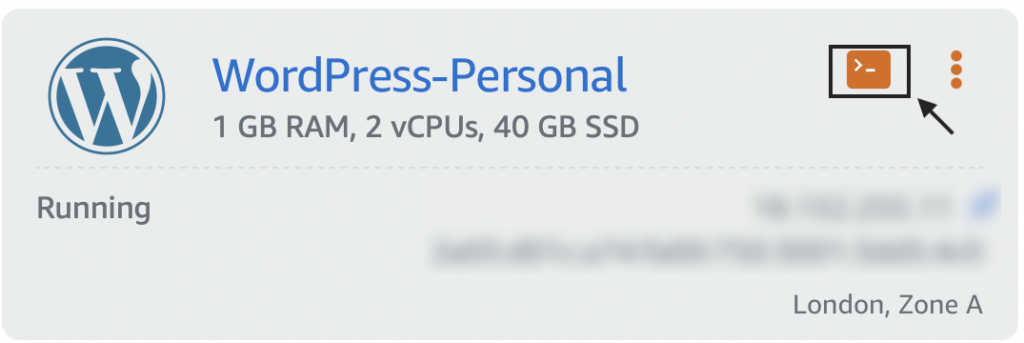
Copy the password and then go back to your WordPress admin login page and put in user under “Username or Email Address” and paste the password you just copied under “Password”. Once you login, you can then customise how your website looks there.
Setting Up a Lightsail Static IP Address
Eventually, we want to link up our domain name to the IP address of our WordPress instance created earlier. Before we do that, we need to first create a static IP. As the name suggested, a static IP has an unchanged IP address after your instance get rebooted in the event of failure. Click on the name of your instance and then click on the “Networking” tab. Click on the ‘Create Static IP’ button in the Public IP tile and the choose the location for the static IP and provide a unique name to identify it. Finally, attach the WordPress instance to this static IP and then go ahead to click “Create”.
Once your static IP is created, you can see something like the following. It can be detached anytime you like.
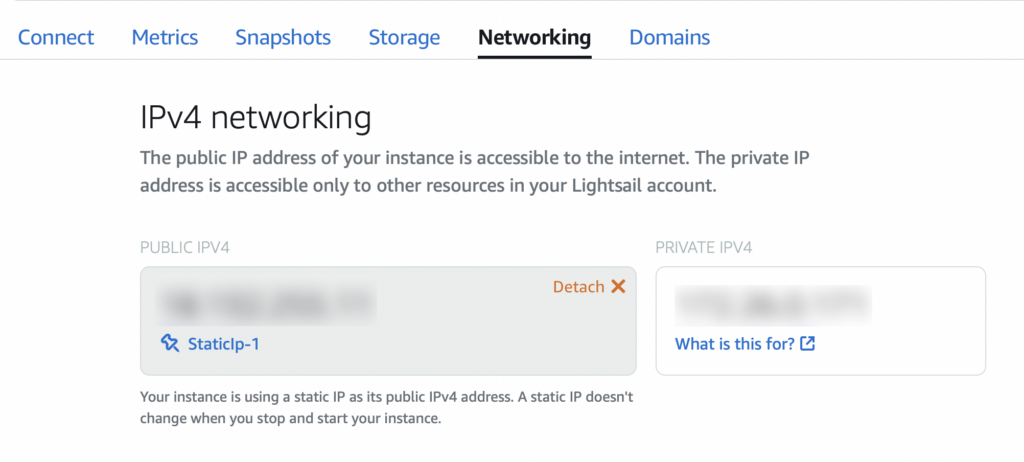
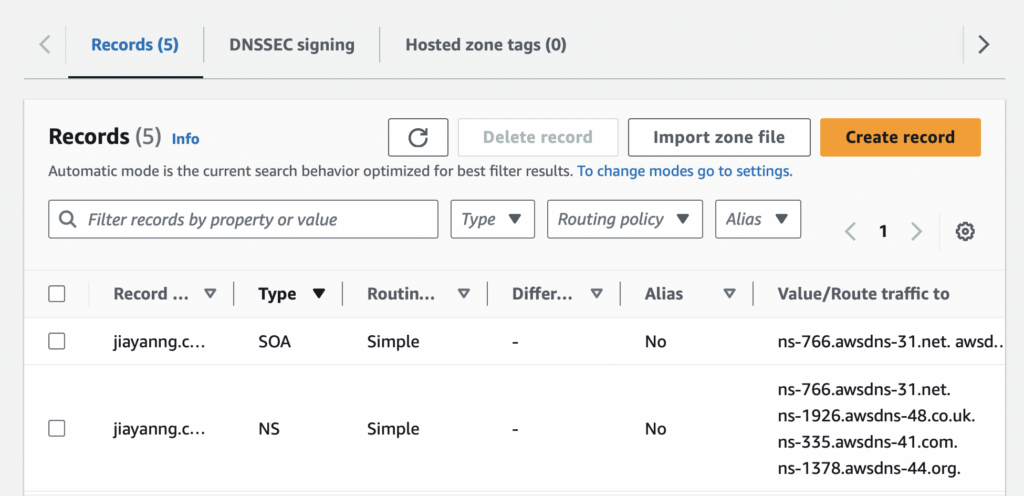
Next, we need to map this static IP address to the domain name we registered earlier with Route53. Go back to home console and navigate to the Route 53 service again. Click on the “Hosted zone” and then the domain that you have just registered. You can see two default records have been created for you. In order to map the static IP address to our domain name, we need to create two records.
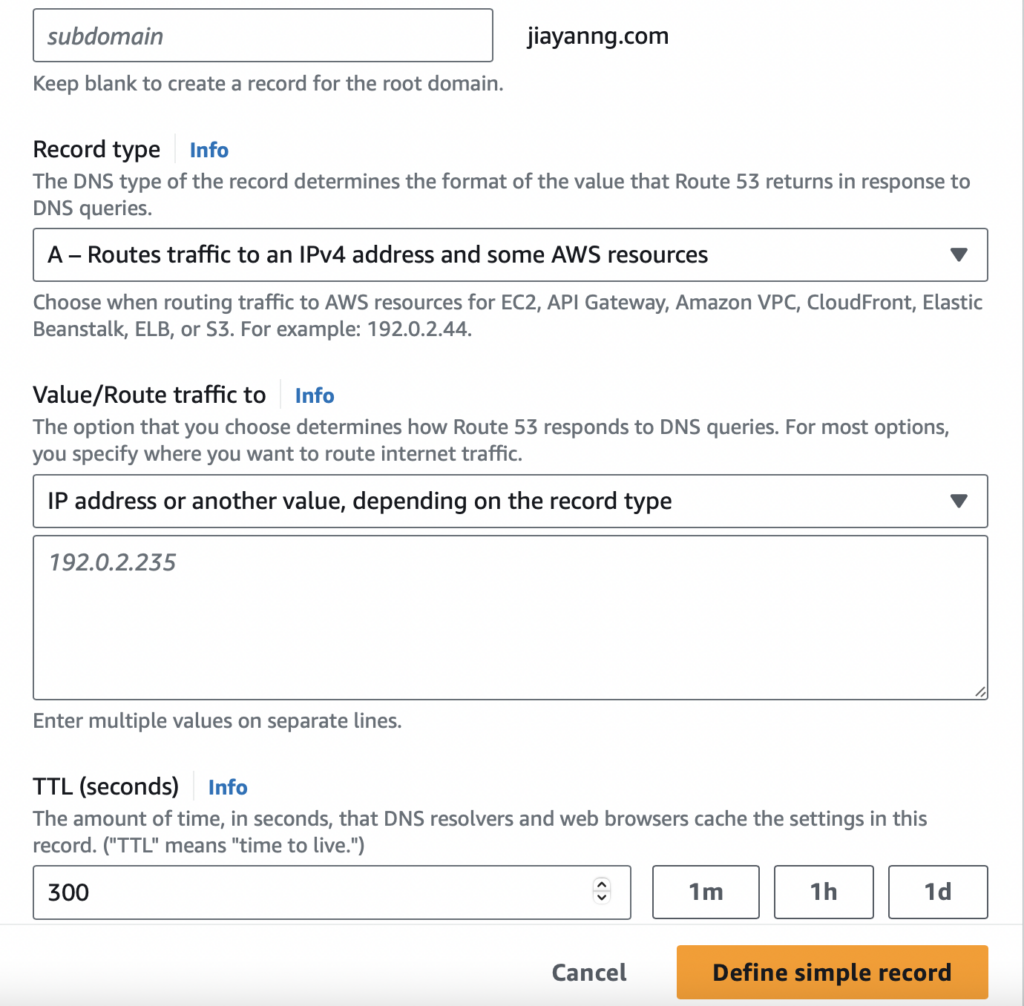
First, click on “Create record” and the choose “Simple Routing” and then click on “Define simple record”.
You can see a window like this, choose record type “A – Routes traffic to an IPv4 address and some AWS resources”, and then select “IP address or another value, depending on the record type”. Enter the static IP address in the text box and leave the TTL value as it is. Proceed to “Define simple record” and then create the record.
Now, when you type your domain name into your web browser, you should see the sample WordPress page. If you also want to include ‘www’ in your domain name, create another simple record. This time, enter ‘WWW’ in the subdomain field and input the same settings for the other fields as before. By default, this connection is insecure, so you still need to enable HTTPS on your WordPress instance in AWS Lightsail. You can follow the detailed guide in the AWS documentation. After that, create another simple record, this time including HTTPS://www in the subdomain field, and keep the other settings the same. Your record settings should look like this.
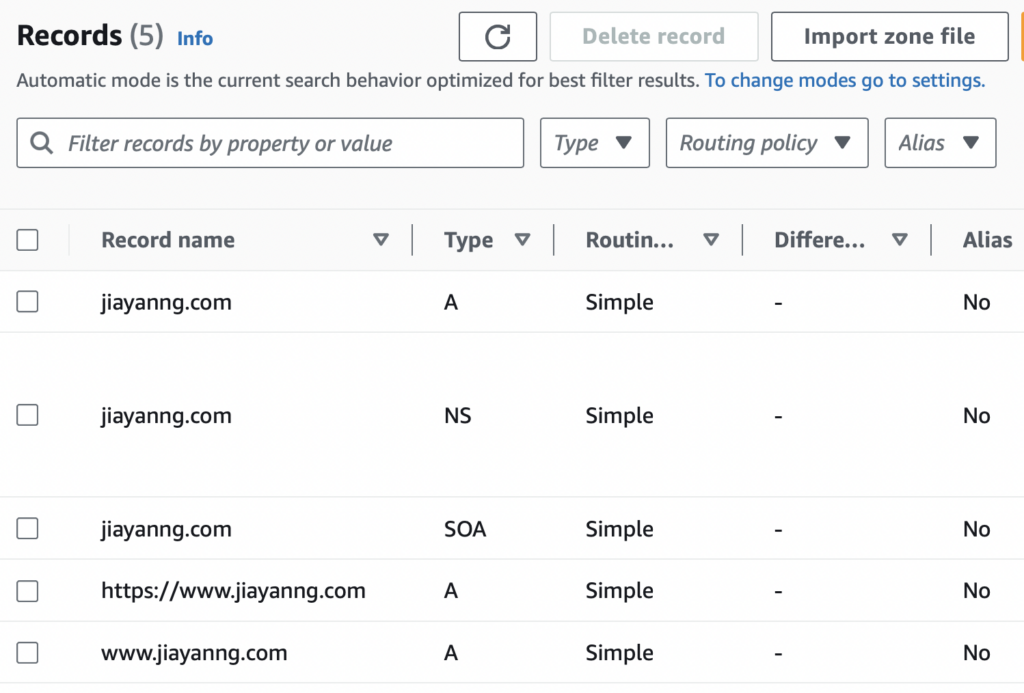
Note that the www mapping will take awhile. Come back to it after a day or so, it should be mapped by then. So there you have it, a simple way to setup your personal website using WordPress with AWS Lightsail.
